The 3D Illustrations and Retouching Projects of Radoxist Studio


The 3D Illustrations and Retouching Projects of Radoxist StudioRadoxist Studio is a 3D illustration and retouching studio based in Bratislava, Slovakia that specializes in high quality visuals for advertising. They have worked with many well-known agencies such as TBWA, BBDO, Saatchi and Saatchi, and more. In this article, we will take a look at some of our favorite work from their portfolio.

Aupark – Last Minute
Dulux – Nightmares
Bee Factory – Do the Right Mix
Worth Enough?
Union – Travel Insurance
One Drop
Cossette – Dinosaurs
Opinel – Lace Project

How to Retouch and Airbrush Skin in Photoshop Read more at http://photoshoptutorials.ws/photoshop-tutorials/photo-retouching/retouch-airbrush-skin-photoshop/#uMhgrxOERwT1VEO8.99


Learn how to retouch skin professionally in Photoshop without making it look fake or blurry. In this Photoshop tutorial, you will learn how to reduce wrinkles and blemishes, airbrush skin naturally, dodge and burn, and more using all non-destructive editing techniques. Once you learn this, you can make everything from natural skin improvements to glamorous airbrushed skin used in advertising.
Skin Retouching Layers Diagram

Step 1

Open the image that you want to edit. The photo should be high-res with a lot of skin details. For educational purposes, this tutorial will be shown using a photo with more dramatic skin flaws. We like to thank DepositPhotos.com for providing the stock photos used in this tutorial.

Image Credits: Natural portrait of a senior | Stock Photo © Sebastian Wahsner

Step 2

To begin, we’re going to start with a subtle skin retouching method that uses the Yellow channel to reduce skin flaws. Go to Image > Mode > CMYK. In the Channels panel, click on the Yellow channel. Copy this channel by pressing Ctrl/Cmd+A then Ctrl/Cmd+C.

Step 3

Undo the steps by pressing Ctrl+Shift+Z or Cmd+Option+Z on Macs until you’re back in RGB mode. Press Ctrl/Cmd+V to paste and the Yellow channel will appear as a new layer. Name this layer “Flaws”.

Step 4

Invert the layer by pressing Ctrl/Cmd+I then change the blending mode to Soft Light. Reduce the opacity until you get the results that you like. You can add a layer mask and erase the areas around the face if it is affecting the color/details of the surrounding areas. We don’t need to do this for our photo because the layer doesn’t affect the surrounding areas in any noticeable way.
Here’s the before and after of using the yellow channel to reduce skin flaws.
before

after

Step 5

Before we do any sort of airbrushing on the skin, we’re going to use the Spot Healing Brush to reduce wrinkles and blemishes. Select the Background layer then duplicate it by pressing Ctrl/Cmd+J. Move this layer to the top then rename it to “Wrinkles & Blemishes”.

Step 6

Use the Spot Healing Brush to erase the wrinkles and blemishes. Reduce the opacity of the layer to bring back some of the wrinkles and blemishes then position this layer below the Flaws layer.We’re pretty much done and as you can see in this before and after preview, the skin looks a lot better than before.

Step 7

If you’re happy with the results, you can stop here. But if you want to continue with some more dramatic skin retouching techniques, follow the rest of the tutorial to learn how to airbrush skin and reduce discoloration in the skin.
Before we proceed, convert all your layers into a single Smart Object. To do this, Hold Ctrl/Cmd and select all the layers. Right-click on the layers then choose “Convert to Smart Object”. This will save you time by letting you make changes to the faces at a later time without having to undo and redo everything. Rename this layer to Original.


Step 8

Duplicate the layer then rename it to “Smoothness”. With the Smoothness layer selected, go to Filter > Blur > Surface Blur. Set the Threshold to 255 levels then adjust the radius so that you can barely make out the face.
Reduce the Threshold until you can just start to make out the details. The skin should still be very blurry. Click OK to apply the filter.

Step 9

Duplicate the Original layer then move it to the top. Name this layer “Details”. This layer will be used to restore the details lost in the Smoothness layer.

Step 10

Go to Filter > Other > High Pass. Adjust the radius setting until you can barely bring back the details.

Step 11

Change the blending mode of this layer to Linear Light. The skin looks cleaner, but it looks overly airbrushed and has a fake plastic look to it. This may work well for younger subjects with fair skin, but for skin with more complexions, you’ll have to reduce this for it to look realistic. Here’s what the airbrushing looks like before and after.
handle
Before
After

photoshop educational

It is not Adobe Photoshop, or Adobe Illustrator, but close enough! Aviary


Did you know? You can create, edit, store and share graphics and sound files right in your Google Apps account?

It is not Adobe Photoshop, or Adobe Illustrator, but close enough! Oh yeah, and it’s free. Aviary is a very powerful suite of browser-based design tools, now available right from within our Google Apps account! If you are looking to do some basic image editing (crop, resize, rotate, effects), or if you are looking to edit some audio recordings, create a business card, or something similar, but don’t have these tools on your home computer, look no further. Give the Aviary suite of applications a try – right in your browser.

Aviary is a suite of FREE web-based design tools. There is an ‘educational version’ hosted on their website (www.aviaryeducation.com), but now Aviary can be embedded in your own Google Apps account! You can use Aviary to create, edit and share a variety of digital files in your classes or offices.

Aviary offers the same power and capabilities of leading desktop editors and design tools, with the freedom and flexibility of browser-based applications. Whether you are trying to edit a screen capture of your website, remix a music track or create a logo for your new program or extracurricular, Aviary has the right tool for you. Additionally, any new projects you create will be stored as a document in your “Aviary Files” folder in Google Docs! From there, you can share your Aviary files with colleagues and students.

Over the next few days I will be highlighting one specific Aviary application to focus these emails a bit. For now, if you are interested, you can start a new project using any of their preset templates available. To access Aviary’s tools, log in to your Ignatius email account, and in the top left menu (to the right of ‘Documents’ and ‘Sites’) you will see “more”. Click the “more” link, and from that list you will see ‘Aviary’. The Aviary page will display, giving you access to start a new project from scratch – or choose from a template.

Some of the project templates available include:

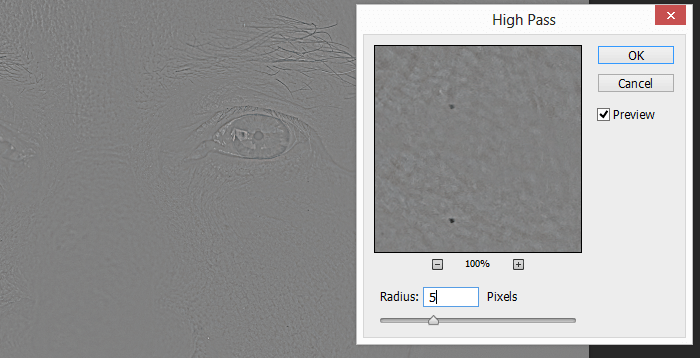
Edit and Markup Images

Business Card
Letterhead
Powerpoint slide
Label
Powerpoint slide
Screen capture
Add arrows/text
Annotate image
Create Vector Illustrations

Make a logo
Create a tshirt
Create icons for your website
Edit Audio

Mix a podcast
Record audio
Audio filter effects
Remix music

Easter Bunny Lux Party Flyer (PSD)

Easter  will be breathing down your neck for the perfect Easter flyers, whether that’s for a sexy Easter bunny party or just an ...
Easter Bunny Lux Party Flyer/Poster PSD Template
Easter Bunny Lux Party Flyer/Poster PSD TemplateThe PSD file is very well organised, with color coded groups and layers named appropriately. You can easily change texts, content, images, objects and color palette.PSD | 1275x1875 px (4.25x6.25" with 0,25" bleed) | CMYK | 300 DPI | 17.5 Mb


In order to comfortably and with maximum speed to download my files, I recommend you get premium access to the file-sharing services such as i-filez and letitbit (listed below). When you use the premium access, download speed is limited only by your communication channel. We also strongly recommend to buy a premium-only access to the sites of file-sharing services, the only way you're guaranteed to not be deceived!
Download free Easter Bunny Lux Party Flyer/Poster PSD Template:


Download free flyer PSD design templates, club and party flyer, unique freebies and design resources, news and best of flyer collections - AwesomeFlyer Blog
The Next Day Flyers Graphic Design Blog and Printing Blog is the Place to go for the Latest Graphic Design, Marketing and Printing Tips.
Thinking of printing some night club flyer designs for your next club event or promotion? Check out these awesome club flyer designs for some inspiration!
Bavaria city race 2008 porsche drift Hofplein
Arts & Crafts: Are you crafty like Martha Stewart? Learn how to embroider, knit a new quilt, do crafts with your kids, and more on eHow. Get essential tips for sewing ...
Welcome to the group! You've come to the right place...all top quality themes are here from different theme authors. Certified FREE and original...top-quality and 100 ...
Cheat Freak offers thousands of cheat codes, tips, secrets and game cheats for all your favorite games. And if you have some that aren’t here then you can share 
Find great deals on eBay for pez and disney cars. Shop with confidence

Best Easter PSD Flyer Templates for Easter 2013


Hey there, it’s definitely time for a new great flyer collection, so what is the next big event? Of course easter! So take a look at the top 15 best easter psd flyer templates for easter 2013! Check it out and enjoy!

1. Deluxe Easter Flyer
best easter party club psd flyer templates for easter 2013 to download
2. Easter Egg Hunt Flyer
best easter party club psd flyer templates for easter 2013 to download
3. Easter Glam Party Flyer
best easter party club psd flyer templates for easter 2013 to download
4. Easter Picnic Poster Print Template
best easter party club psd flyer templates for easter 2013 to download
5. Easter Time Party
best easter party club psd flyer templates for easter 2013 to download

6. Easter Celebration Flyer Template
best easter party club psd flyer templates for easter 2013 to download
7. Easter Party Flayer Template
best easter party club psd flyer templates for easter 2013 to download
8. Easter Flyer Template
best easter party club psd flyer templates for easter 2013 to download
9. Easter Party Flyer Template
best easter party club psd flyer templates for easter 2013 to download
10. Agape Love Church Flyer and CD Art Template
best easter party club psd flyer templates for easter 2013 to download
11. Easter Bash Flyer Template
best easter party club psd flyer templates for easter 2013 to download
12. Easter – Flyer Template
best easter party club psd flyer templates for easter 2013 to download
13. Happy Easter Flyer Template
best easter party club psd flyer templates for easter 2013 to download
14. Easter Bunny Party Flyer
best easter party club psd flyer templates for easter 2013 to download
15. Easter Club-Party Flyer Template
best easter party club psd flyer templates for easter 2013 to download