Send Photos by Email with Adobe Photoshop Album


When you want to send digital photos by email, it's considered good 'netiquette' to reduce their size so they do not take a long time to download ...Emailing Photos from Adobe Photoshop Elements 3. Attach to E-mail in Photoshop Elements 3. By Sue Chastain, About.com Guide. When you want to send ...

When you want to send digital photos by email, it's considered good 'netiquette' to reduce their size so they do not take a long time to download and can be viewed more easily on the recipient's screen. Adobe Album's "Attach to Email" command makes it easy to send one or many photos by email, and it does all the resizing work for you.

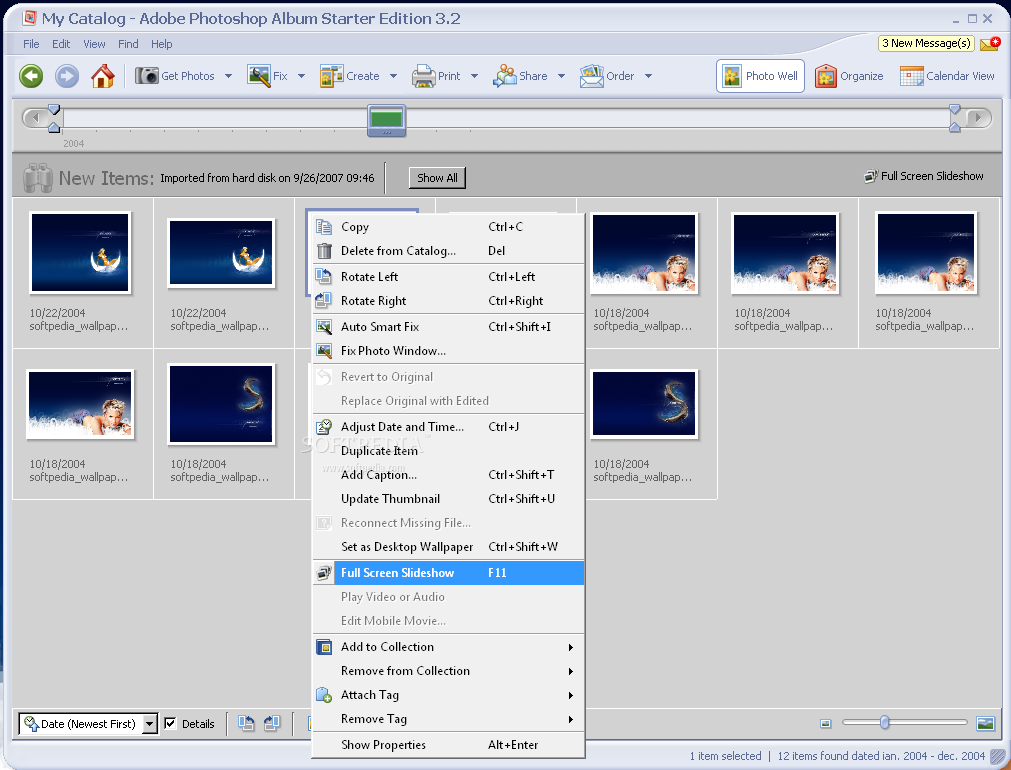
Tip: After I have imported a new batch of photos into Album, one of the first things I do is go through them and mark the best of the bunch with the "Favorites" tag. These are usually the photos I wish to email to people. By marking them with the favorites tag, it's easier to select them from similar photos in the photo well.

To email your photos from Album, first select them in the photo well, then choose File > Attach to Email. The first time you do this, you willget a dialog box asking you to choose your default email program. Next, a new Window will appear with previews of the photos you have selected, a section to select recipients, and several other options described below.

Although you can add contacts to Adobe Album and select recipients here, it is not necessary. After choosing options in this screen, Album will open your default email program and you will be have the chance to choose recipients there. There is one drawback to not choosing the recipients in Album, however. You will not be able to use Find By History to look back and see who you emailed your photos to.

Other options in the Attach Items to Email screen are:

Share Tags - This option will allow you to include keyword tags with your photos so that other users of Adobe Album can import them into Album with pre-assigned tags. Even users of the free Starter Edition of Album can take advantage of this. I always use this option. The only reason you might not want to is if you're sending the photos to users on a Macintosh or Windows 98 system (since there is not a compatible version of Album for these operating systems) or if the recipient has requested that they not receive tags.

Choose File Type:

PDF Sideshow - If you know your recipient has the free Adobe Reader (version 6 is required), you may wish to use this option to send the photos as a slide show. Multiple photos will be bundled together into one PDF file. The slide show will run automatically and it offers the recipient options to save or print the photos in your slide show. You'll also need to enter a file name when you select this option.
Individual attachments - This will resize the photos and attach each one as an individual file. If you selected any files that were not already JPEGs you also have the option to convert them to JPEG. I would advise checking this option since some recipients may not have a viewer for other file types.
Size and Quality - Here you can choose the size Album will use to resize your photos. Smaller will result in faster downloads but recipients will not get as much detail in the file. I recommend using small or medium unless you know your recipients have a high-speed connection.

If you have chosen individual attachments for the files, Album with show you an estimate of the total file sizes and approximate download time. Keep in mind that some Internet Service Providers have an attachment size limit (sometimes as low as 1 MB), so it's a good idea to keep the total under 1 MB when sending to dial up users. Album will also warn you about attachments over 1 MB.

If you have chosen PCF slide show for the files, you will not get a size estimate until after clicking the OK button. When Album determines the file size of the slide show, you will have the option to cancel or continue.

Click Customize if you want to change the settings for the Big/Medium/Small presets.

After setting your options, click OK. You may have to wait a few moments if there are a lot of files to process, but soon you'll see your default mail program's message window with the files already attached. Album fills in the subject line and message body with some default text which you are free to edit. Next, just choose the recipients if you haven't already and send!

Emailing Photos from Adobe Photoshop Elements 3


Individual Attachments - This will resize the photos and attach each one as an individual file. 

Adobe Photoshop Elements 3.0: Digital Photography Review
Email. Adobe has today announced Photoshop Elements 3.0, Photoshop Elements 3.0 adds new ways to organise and share photos, to the award-winning photo editing functionality that has long been a hallmark has Digital Photography Review


If you selected any files that were not already JPEGs you also have the option to convert them to JPEG. I would advise checking this option since some recipients may not have a viewer for other file types. In the Size and Quality section you can choose the size Elements will make your photos. Smaller will result in faster downloads but recipients will not get as much detail in the file. I recommend using small or medium unless you know your recipients have a high-speed connection. The customize button just takes you to the E-mail Preferences which we discussed in a previous lesson. Elements shows you an estimate of the file size and approximate download time for the e-mail using your settings. If the size if very big (over 1 MB) and you'll be sending to people on dial-up, you may need to go back and reduce the size of your photos.
The individual attachment option isn't quite as fun as the other two, but it offers the most trouble-free way of sending photos, since all e-mail clients can handle attachments, and every computer is able to view JPEG files.

Adobe Photoshop Album and Photoshop Album Starter Edition


Adobe Photoshop Album:
Adobe Photoshop Album Starter Edition represents an easy way to organize your photographs and display them for the whole world to see.


Adobe Photoshop Album Starter Edition is an application from the Adobe family designed to organise

Photoshop Album was a product from Adobe Systems, Inc. for home digital camera users and amateur photographers on the Windows platform. A Macintosh version was never released. Originally, Photoshop Album was available in two versions -- a "Starter Edition" which was a free download from Adobe.com, and a more robust retail version.
With Adobe's release of Photoshop Elements 3.0 in 2004, all features of the retail version of Photoshop Album (version 2.0 at the time) were merged into the Organizer component of the Photoshop Elements 3 product, and Photoshop Elements became the upgrade path for users of the retail version of Photoshop Album.

For several years, Photoshop Album Starter Edition remained a free download, offering basic photo organizing and editing tools, and acting as a preview teaser for the Photoshop Elements product, which combines Photoshop Elements Organizer and Photoshop Elements Editor as a fully integrated digital photo solution intended for non-professional digital photographers. The latest version of the free product was Adobe Photoshop Album Starter Edition 3.2 and is still available for download from Adobe.

dobe Photoshop Album Starter Edition software is no longer available. Adobe discontinued the product and ongoing technical support ended June 30 2009.

Note for former users of Photoshop Album Starter Edition:

Understand that your pictures are not IN Photoshop Album, nor are they being held hostage by Photoshop Album Starter Edition. Photoshop Album only creates a catalog (database) of the digital image files on your computer. Your pictures can still be accessed through Windows Explorer or through another photo management program. They can most likely be found in a folder under your system default Pictures folder.

There are many better alternatives to Photoshop Album Starter Edition available today. For free alternatives, I suggest Picasa or Windows Live Photo Gallery.

If you need to preserve your tags and catalog data, your best bet is upgrading to Photoshop Elements. If you only need to preserve your keyword tags and captions, you can convert your Photoshop Album catalog with the trial version of Photoshop Elements, then run the write tags to files command to preserve the tags within your picture files. You can also migrate your photos to Photoshop.com and manage them using the free online Photoshop Express service.

Adobe also offers frequently asked questions about Album Starter Edition, including instructions for migrating your photos to Photoshop.com.

Happy Birthday Photoshop Animation

Happy Birthday Photoshop Animation


My Photoshop Creation This is my birthday wish for Photoshop. Thanks to Dave in the forum for bringing this challenge to us.
 Happy Birthday Photoshop AnimationHow I Did It: I used lots of layers & groups of layers to make this design. Also did a bunch of bevels on each element of the design. Then animated the whole thing. The background paper was made using the color fill & then adding a crinkled look with a brush. Each letter of Photoshop was made using a slide frame and one letter grouped together. The Happy Birthday were made with the perspective transformation.
Lessons Learned
Using animation hasn't been something I've done much of, so that was the biggie lesson. I had to go back to tutorials to figure out parts of it. Photoshop always has something new for me to learn, great mind stretcher!
Which products in the Photoshop family do you use? InDesign & Photoshop pretty much daily. Also Illustrator, DreamWeaver, Acrobat & occasionally Flash all in CS4.
What was the first version of Photoshop you used? I think it was 5.
What Photoshop feature has impacted you the most? Why? I think the layers are what I use the most & I love the many brushes I've gotten in Adobe Exchange.
Tell us about your experience using Photoshop. I am an ad designer for a small publishing company. I don't use Photoshop much at work, mostly InDesign. But I do a lot of Photoshop at home making scrapbook pages.

virtual photographer plugin


Virtual photographer plugin

Virtual photographer lets you instantly apply high quality, professional photographic styles to your digital images, with just one click.

virtualPhotographer includes over 50 presets that automatically apply combinations of film grain, color modification, B/W, soft focus, high contrast and many artistic effects to achieve the same professional-looking images that used to take hours of photo editing. Get results in seconds!

“Fix it fast…helps you adjust brightness, as well as add style, ambiance, seasonal colors, and more.”

  - POPULAR PHOTOGRAPHY

“virtual Photographer offers so many features and options to edit and apply effects that it can almost be considered its own standalone program.”
  - EXTREME TECH
virtualPhotographer lets you instantly apply high quality, professional photographic styles to your digital images…with just one click.


Adjust film grain, color, B/W, soft focus, high contrast and many other effects to achieve the same professional-looking images that used to take hours of photo editing. Get great results in seconds.

Get the latest version of our popular FREE one-click photo effects plug-in downloaded by over 5 million digital photographers worldwide.
Now with new one-click effects – including Polarize, Infrared, Cross Process, and Gradient
Large, resizeable preview window
Batch mode
Save your own favorite filters in the effects folders
Handles larger images
New tabbed controls
Easier effect navigation
Split-screen preview


virtualPhotographer 1.5.6 – Photoshop Plug-In
UPDATED


Ideal for landscapes
Stunning photographic effects are just a click away.


Ideal for portraits
Create unusual portrait effects with ease.

Compatible with Photoshop® CS4 and older, Photoshop® Elements, Paint Shop™ Pro®, Photo-Paint and other popular imaging applications. Install on Vista, XP, Windows, or Windows ME operating systems.

virtualPhotographer Samples
Others Using virtualPhotographer

happy birthday photoshop text effect


Happy Birthday Cupcake Photoshop Wallpaper and Brush Pack
Happy Birthday to YOU!! To celebrate all your friends' and family's birthdays, you should surprise them with a sweet homemade cupcake! Doing that will be easy with this new Happy Birthday Cupcake Photoshop Wallpaper and Brush Pack. Included in this pack is a highly detailed birthday wallpaper, and the cupcake brushes to go along. Head over to Vecteezy for the vector version and download the Happy Birthday Cupcake Vector Pack!


Not found photoshop brushes about happy birthday text free download please try some popular

22 birthday brush
22 birthday brush
dvd resource text, barcodes and logo brush
dvd resource text, barcodes and
text brush
text brush
photoshop 7.0 & higher �� grunge text and mess brush
photoshop 7.0 & higher �� grunge

29 random text from disney movies. all brush
29 random text from disney movies.
32 text brush
32 text brush
25 rent text brush
25 rent text brush
heart text brush
heart text brush
text brush
text brush
scribble text brush
scribble text brush
text brush
text brush
Swirls and Seeds Photoshop Brushes
Happy Heart Attack
Happy Heart Attack
graffiti arrows brush

Lightroom 4 or Aperture?


Aperture. It's the best.
Well I was one of the lucky few to get my hands on one of the new Retina Display Macbook Pros when they first came out and have recently gotten into photography with a Sony A56 (Which I love!) and was wondering which photography program would be better to get. Lightroom 4 or Aperture?

If Aperture wasn't available I'd use Lightroom, because it's excellent, but it doesn't compete with Aperture for a solo photographer.

Lightroom is a better choice for working team photographers who have to share raw work with other teams, because it runs on windows which other teams may be using, but for the solo photographer with a Mac, Aperture is the superior choice (albeit marginal).

Lightroom has two features where it kills Aperture, perspective correction and chroma noise reduction. If you constantly shoot with wide lenses from distorted angles, or in insufficient light, these conditions could swing it for Lightroom (and this applies to smaller sensor raw capable cameras where light is nearly always insufficient)

But for everything else, Aperture matches or bests Lightroom. Some of these areas will be subjective and therefore debatable, but some are a simple feature-count or checklist which are facts (although even these become out of date due to upgrades, in both directions).

At introduction both competed on comparable features, but with recent releases, they have taken different roads. Lightroom offering more processing features, while Aperture offers more integration features.

On balance, that should have swung it in Lightrooms favour, because processing is the main end result, but the truth is, I take many more shots than needed and so culling and rating is a big task at the start of my workflow. Of those I keep, only a small percentage get used, so again, Apertures superior organising wins. Of those used, most require only a degree of finessing, at which both Aperture and Lightroom are equally capable. It's only when I come to those select images which need extra (sometimes extreme) attention that Lightroom begins to score points. But in this regard, even though Lightroom would score higher, there are much better options than either Aperture or Lightroom, and for this, I use the NIK suite. So for me, this negates Lightrooms wins, and gives it to Aperture. Apertures gaps can be plugged, Lightrooms can't.

This all may seem like a huge bias towards Aperture, but that's only because I use it daily and small (even tiny) differences become significant. As I already said, if Aperture wasn't available I'd have no problem switching to Lightroom. Lightroom is great and it would be a fairly small inconvenience and still a great solution. But for as long as Aperture is here, that's what I'm taking. For me, it really is better.

Aperture Vs Lightroom 4:Discussing Do you use lightroom or aperture?


Aperture Vs Lightroom 4:Discussing Do you use lightroom or aperture?

Could anybody tell me which is better between Aperture and Lightroom 4 please. I need to decide

OK, I'll summarize what I've een talking about here below.

 They are each excellent programs.  Since you are looking at Aperture, you must be on a Mac.  Aperture offers significantly better integration with the OS and other Mac programs than Lightroom -- but that is not really a primary concern.  They are so similar, you could chose from them like you would a clock-radio: look at each, and pick the one that you wouldn't mind seeing every day.  Or you could do the hard work: list your specific needs in terms of your workflow, your storage, your processing, your output -- how you take digital photographs, with what equipment, and what do you do with them -- and then look up each program's specifications and see which matches up best.

The nice thing is, you cannot go wrong.

This does come up a bit -- look in the "More Like This" section in the right column for links to other threads on this topic.
The similarities between Aperture and Lightroom;
 I'm glad I could help and I'm glad you decided. I think you'll enjoy LR. I've been a very loyal Aperture fan for years but have just switched to LR recenlty. Make sure to learn what catalogs, folders and collections are and I bet you'll be a super LR user in no time.

I don't really understand the question? What version of PS should you buy? If I was you I'd play with LR for a long time before deciding if you need PS. Most pro's find they are doing moe and more of thier work in LR completely. PS can sure do things that LR can't, don't get me wrong. I'm just saying LR (or Aperture) can do ALOT!

If PS is definitely on the plate then what's your budget?

If money is no object and you only will ever be interested in photography, then I'd say buy PS CS6.

If you are strapped for cash then find a previous version for sale. I wouldn't go before CS4, when they added 64 bit.

Make sure to take advantage of the education or teacher versions. Just know upgrading down the road may be hindered if you do.

Creative Cloud-
   If you don't mind spending more in the long run, want to always have up to date software, and want to dabble in video, audio, web sites in the future then go for Creative Cloud. It the leasing service Adobe just invented. If you do the math it's highway robbery.
   That being said I'm a creative cloud customer. I went from PS CS3 to now having access to all of CS6, and let me tell you I LOVE it. It's given me no excuse to not download a new software and totally be blown away by what thier other software can do.
They both protect the color space
They both preserve the RAW file
allow area specifi editing
interface with PS seamlessly
allow external HDD support
have advanced slideshow functionality
have large user groups making presets
have cut and paste adjustments.

Differences between Aperture and Lightroom are minor.
Aperture has better Apple app workflow
Aperturet has photostream support
Aperture works inside iWeb, iPhoto, iMovie etc...
Aperture has more complete retina support (as of right now)
Lightroom has minor video editing capability (some photo edits can apply to video, easing workflow)
Lightroom works better with PS if you are doing HDR or timelapse
Lightroom's cummintity support is better. You'll get more free presets etc...
Lightroom has customizable brushes
Lightrooms brushes are additive and you can control flow

Creating Focus on the Photo by Using Blur Map


Creating Focus on the Photo by Using Blur Map
On this tutorial i will share with how to create focus effect on photo with different levels of blur.

Final Image Preview

Creating Focus on the Photo by Using Blur Map

Resources

Step 1

Start by opening photo on Photoshop. Now we are going to create a special blur map to focus attention on the object. To do that start by selecting foreground color as black (#000000).
Creating Focus on the Photo by Using Blur Map 1

Step 2

Use the Pen Tool with Shape Layers selected to draw out the figure of a man. Reduce layer opacity to 50% after starting to select man to see the real shapes of the photo.
Creating Focus on the Photo by Using Blur Map 2
In the end you should have man selected like on image below.
Creating Focus on the Photo by Using Blur Map 3
Update layer opacity to 100% for this layer.
Creating Focus on the Photo by Using Blur Map 4

Step 3

Use the Pen Tool to draw out the second shape (left horse) with foreground color #212121.
Creating Focus on the Photo by Using Blur Map 5

Step 4

Now draw third shape (right horse) on the photo with color of #4c4c4c.
Creating Focus on the Photo by Using Blur Map 6

Step 5

Draw another shape by using color #747474. Keep positioning layers like i have which means that this one should be above the layer with the photo.
Creating Focus on the Photo by Using Blur Map 7

Step 6

Draw another shape by using color #9a9a9a.
Creating Focus on the Photo by Using Blur Map 8
Move this layer with shape under all the layers but above the photo layer.
Creating Focus on the Photo by Using Blur Map 9

Step 7

Draw back horse same way but using color #c0c0c0.
Creating Focus on the Photo by Using Blur Map 10

Step 8

Create a new layer and fill with light grey color (#e7e7e7).
Creating Focus on the Photo by Using Blur Map 11

Step 9

Merge all layers except photo layer. Select photo layer and open Channel panel by going to Window > Channels or by clicking on Channels next to Layers.
Creating Focus on the Photo by Using Blur Map 12
Create a new channel. Adobe Photoshop will automatically name it Alpha 1.
Creating Focus on the Photo by Using Blur Map 13
Go back to layers panel. Select all merged layer content by using Ctrl+click on layer thumbnail.
Creating Focus on the Photo by Using Blur Map 14
Copy selected layer with Ctrl+C, select Alpha 1 channel and paste layer content with Ctrl+V. Move a little bit to left to place it correctly.
Creating Focus on the Photo by Using Blur Map 15

Step 10

Hide merged layer visibility on layers panel and also hide Alpha 1 channel on channels panel.
Creating Focus on the Photo by Using Blur Map 16
Select photo layer and apply Filter > Blur > Lens Blur. Don´t forget to change Source to Alpha 1, select Invert and update Shape to Triangle. Also update Blur Focal Distance and Radius like i have on image below.
Creating Focus on the Photo by Using Blur Map 17

Final Image

Creating Focus on the Photo by Using Blur Map
And we are done. We learned to create a nice focus effect on photo with different levels of blur. Hope you liked it.

Creating Roller Shutter in Photoshop


Creating Roller Shutter in Photoshop
On this tutorial you will learn to create a realistic wood roller shutter texture using only Photoshop Tools.
Creating Roller Shutter in Photoshop

Step 1

Create a new document with 800px width and 500px height. Fill background with linear gradient using Gradient Tool.
Creating Roller Shutter in Photoshop 1
Creating Roller Shutter in Photoshop 2

Step 2

Apply Filter > Noise > Add Noise with following settings:
Creating Roller Shutter in Photoshop 3
Creating Roller Shutter in Photoshop 4

Step 3

Apply Filter > Blur > Motion Blur with following settings:
Creating Roller Shutter in Photoshop 5
Creating Roller Shutter in Photoshop 6

Step 4

Select Crop Tool and remove borders of our background texture by cropping each side.
Creating Roller Shutter in Photoshop 7
After cropping your image should look like mine:
Creating Roller Shutter in Photoshop 8

Step 5

Now we are going to increase constrat. Go to Image > Adjustments > Brightness/Contrast:
Creating Roller Shutter in Photoshop 9
Creating Roller Shutter in Photoshop 10
We need to reduce light intensity so go to Image > Adjustments > Hue/Saturation.
Creating Roller Shutter in Photoshop 11
Creating Roller Shutter in Photoshop 12

Step 6

Apply Filter > Sharpen > Sharpen.
Creating Roller Shutter in Photoshop 13

Step 7

Select one Hard Round Brush, 3 pixels and set foregound color to black color (#000000). Draw several lines and when drawing hold Shift key to make them straight.
Creating Roller Shutter in Photoshop 14
Go to Layer > Blending Options and apply following styles:
Creating Roller Shutter in Photoshop 15
Creating Roller Shutter in Photoshop 16
Creating Roller Shutter in Photoshop 17

Step 8

Select Rectangular Marquee Tool and select area as shown below.
Creating Roller Shutter in Photoshop 18
Create new layer and fill selected area with black color (#000000).
Creating Roller Shutter in Photoshop 19

Step 8

Select a soft-edged brush with 80 pixels and opacity 70%. With Eraser Tool selected clean up lower edge of the black area.
Creating Roller Shutter in Photoshop 20
Change Layer Blending Mode to Soft Light and we get a deep shadow.
Creating Roller Shutter in Photoshop 21
Copy layer with Ctrl+J and move it to next line. Repeat process till you have all lines with shadow.
Creating Roller Shutter in Photoshop 22

Step 9

Create new layer on top. Select Brush Tool and Grass Brush (it is one of standard brushes that comes with Photoshop). Change foreground color to green (#00ed00) and draw some grass.
Creating Roller Shutter in Photoshop 23
Apply Drop Shadow by going to Layer > Layer Style > Drop Shadow.
Creating Roller Shutter in Photoshop 24
Creating Roller Shutter in Photoshop 25

Final Image

Apply Filter > Sharpen > Sharpen and this tutorial is over and we got a realistic wood roller shutter.
Creating Roller Shutter in Photoshop