
While Adobe’s open embrace of the cloud has captured the attention (and some ire) of the creative community, let’s not overlook new features crammed in the latest rendition of Photoshop – arguably the preeminent component of Adobe’s suite of design software – designed to make the lives of photographers and designers easier.
If you haven’t already heard, Adobe has abandoned its Creative Suite (CS) in favor of the Creative Cloud (CC), a dramatic move that’s still echoing throughout the software community. Now, instead of paying for a perpetual license for the software collection or each application, users pay a monthly service fee of $10 a month for an individual app, such as Photoshop, or $50 a month for the entire Creative Cloud, which includes access to new features, products, and cloud storage, depending on the membership plan. (Special pricing is also available for students, teachers, existing customers, and those upgrading from the Creative Suite.) For professionals, the cloud provides better collaboration tools for working in teams, but the recurring monthly fee is a turnoff for many. At the same time, a monthly fee can be easier to swallow than a several thousand dollar cost upfront.
Photoshop CC, which recently shipped along the rest of the Creative Cloud suite, introduces new filters (including non-destructive smart filters that don’t overwrite original image data — more on this later), enhanced Adobe Camera Raw functionality, and integration with the cloud. Adobe recently gave us a tour of the new software. Here, we’ll walk you through Photoshop CC’s main highlights.
Installation
Despite the cloud moniker, users will still have to download and install the software on their computers. Creative Cloud manages software updates and will attempt to validate the license every 30 days. Members who pay monthly can use the Creative Cloud for up to 30 days while offline, and those who pay an annual fee upfront can use the software for up to 99 days at a time while offline.
The installation file has been dramatically slimmed down, shedding about 100 megabytes by leaving out Adobe Bridge (the file organization software component) by default. Bridge is still available for download separately, but this exclusion was done in favor of decreasing the download size and installation time.
At the same time, Adobe has done away with Photoshop Extended for 3D image creation, instead streamlining Photoshop CC to include 3D editing and image analysis tools that were previously only available in the extended version. Photoshop CC also supports Apple’s Retina displays, and a number of plug-ins, including Liquify, Lens Correction, and Merge to HDR, also work for high-resolution screens.
Preference syncing
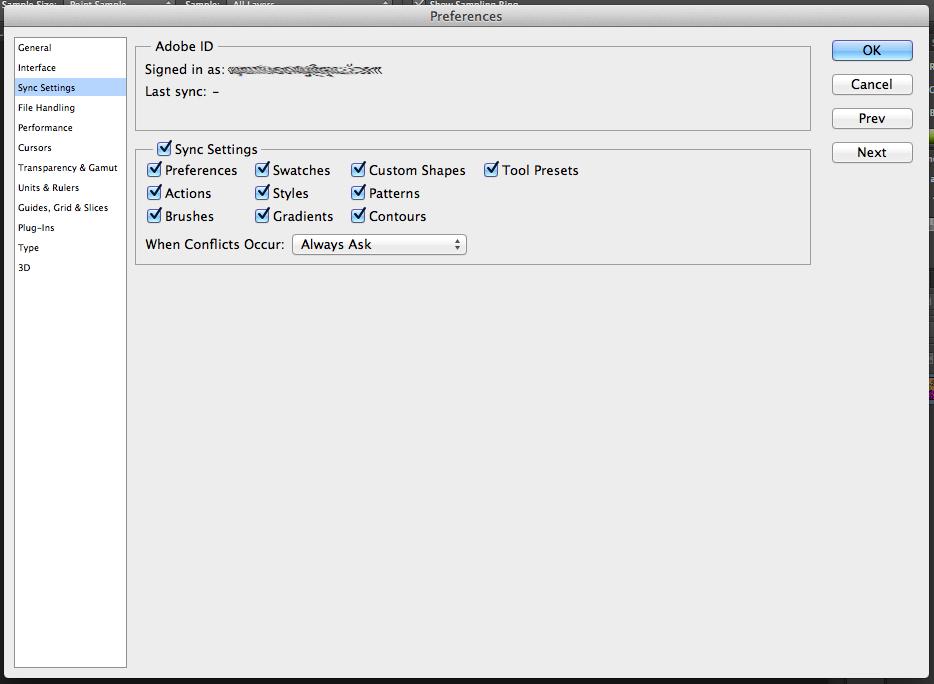
Under the preferences pane, you can choose what Photoshop settings you want to sync to the Creative Cloud. This can also be accessed through the sync settings icon on the bottom left corner of the workspace. Syncing your settings is useful if you plan to use Photoshop CC on multiple computers; when you’re logged into your CC account, your preferred settings are available regardless of the computer you’re on, which can be a huge timesaver. Most Photoshop CC preferences can be synced, but some that are machine specific or performance related were excluded. To sync preferences, you go to the Photoshop Menu, navigate to the email address registered to your account and press sync settings now. There, you can also see when your settings were last saved.
Filters
Most of the features worth getting excited about in Photoshop are filters. The addendum to this latest version will make you wonder if actual photography skills are even needed in a world with such robust post-processing tools readily available. Of particular note, Camera Shake Reduction is mind blowing in effectiveness and simplicity of use. Read more about this and other features below.
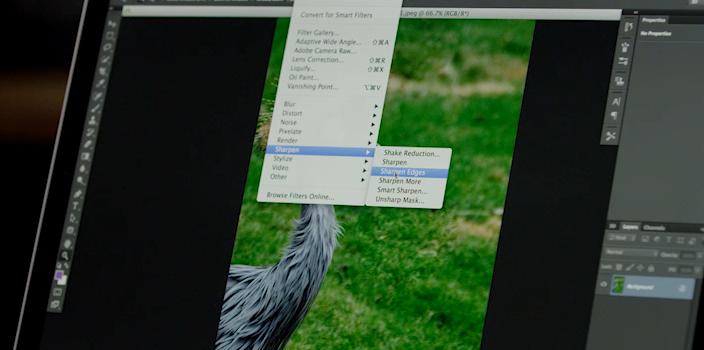
Smart Sharpen
Analyzing images with adaptive sharpening technology, Smart Sharpen can improve clarity to make details pop while reducing noise and haloing effects. To fine-tune images, there are sliders to adjust the amount of sharpening, radius, and noise reduction. Smart Sharpen can be used as a smart filter for non-destructive editing.
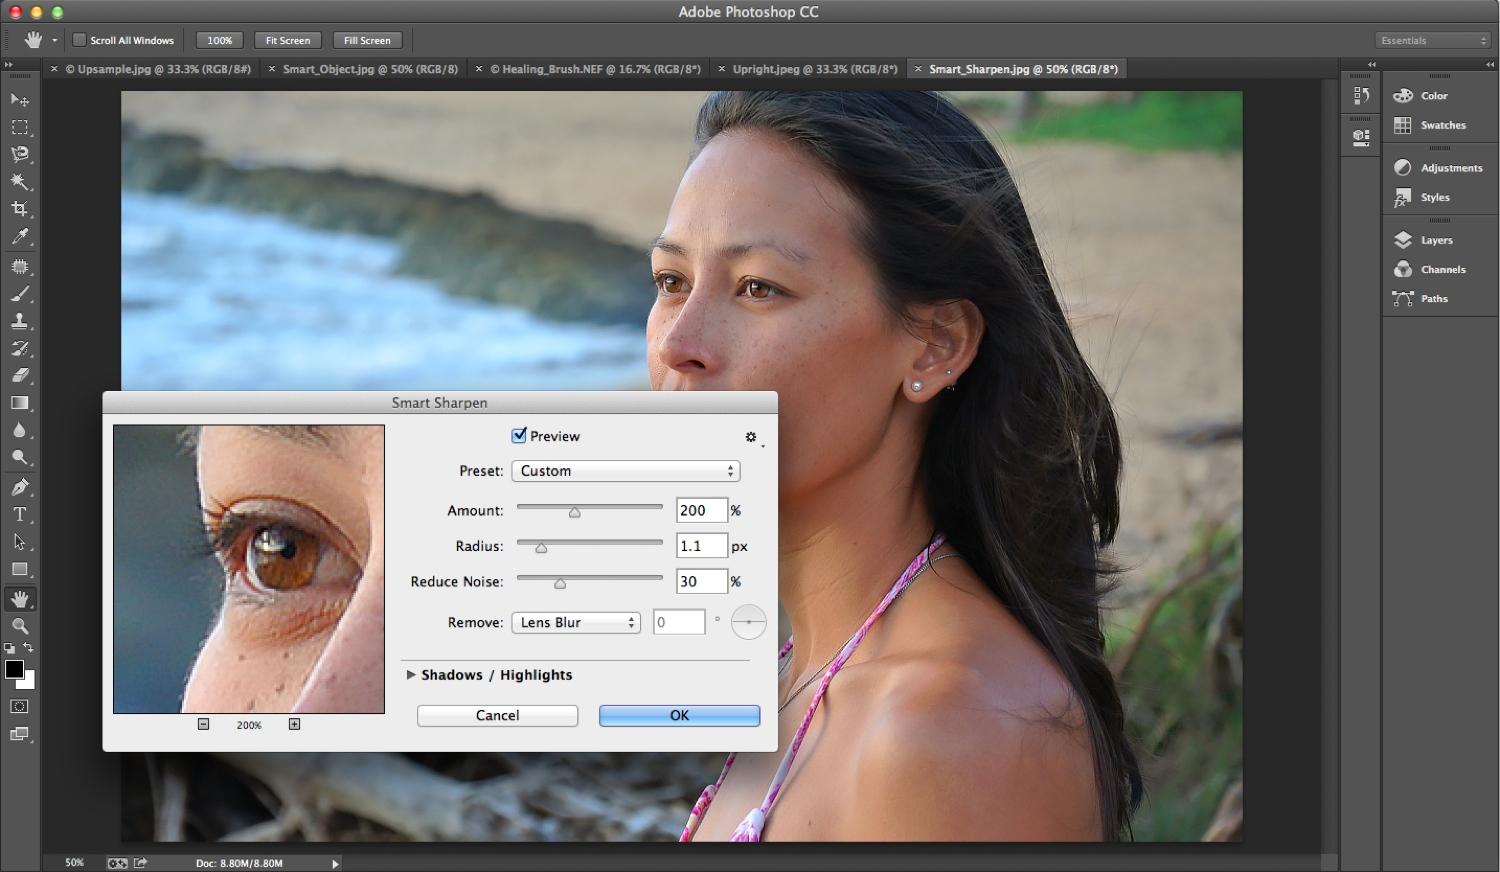
What’s a smart filter, you ask? Though the option to hit undo is there while you’re editing an image, a smart filter lets you make changes without overwriting the original data. Smart filters convert layers into smart objects before a filter is applied, allowing you to re-edit the original photo without removing any data or reducing overall image quality.
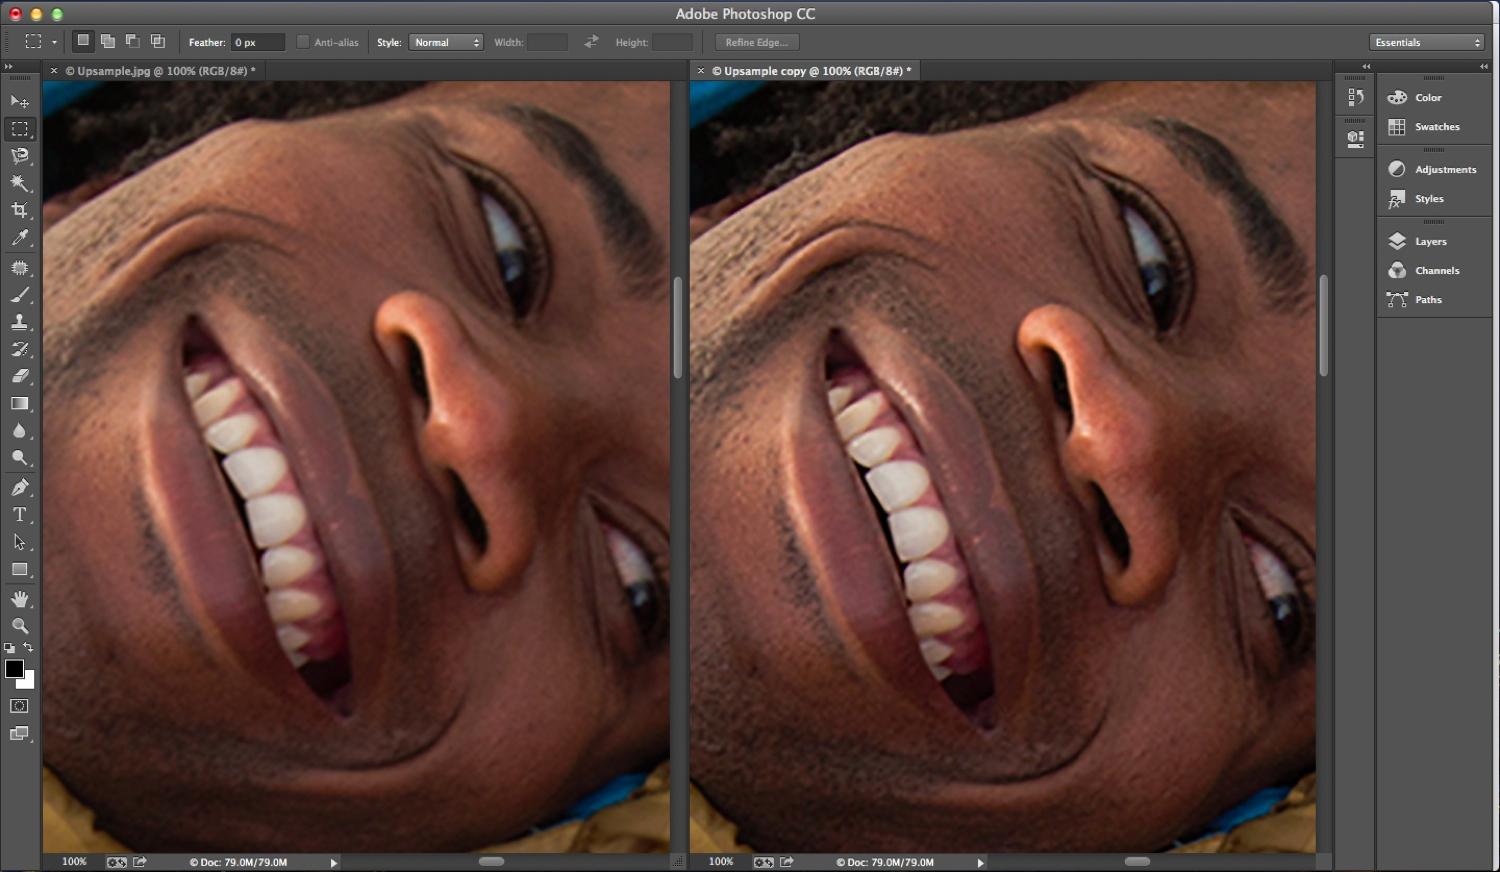
Intelligent Upsampling
We know not to do it, but we do it anyway. Blowing up a lo-res image is sometimes needed, but in the process, noise gets introduced. Intelligent Upsampling, which can be used as a smart filter without affecting the original image, allows you to enlarge small photos for print or enlarge higher-quality images for posters, maintaining clarity for upsampling. Preserve Details, which is located in a drop-down menu under Image Size, lets you maintain details while limiting noise.
Camera Shake Reduction
Those blurry photos from your kids’ soccer games might be salvageable, after all. Camera Shake Reduction analyzes the trajectory of blurs due to camera motion to restore sharpness to images that otherwise would’ve been discarded. When you’re in Camera Shake Reduction, located under the Sharpen menu, expand the advanced options and check the option for “show blur estimation region.” A marquee, which is used by Photoshop to analyze the blur, will show up in the preview panel. You can add other areas by dragging a new marquee or clicking the new detection area icon in the advanced panel. While Camera Shake Reduction seems like magic, it can’t do anything about out-of-focus images.

Liquify
Smart Object support now extends to Liquify, so you can smooth, twirl, pucker, bloat, and make other editing adjustments while keeping the original photo intact.

Adobe Camera Raw
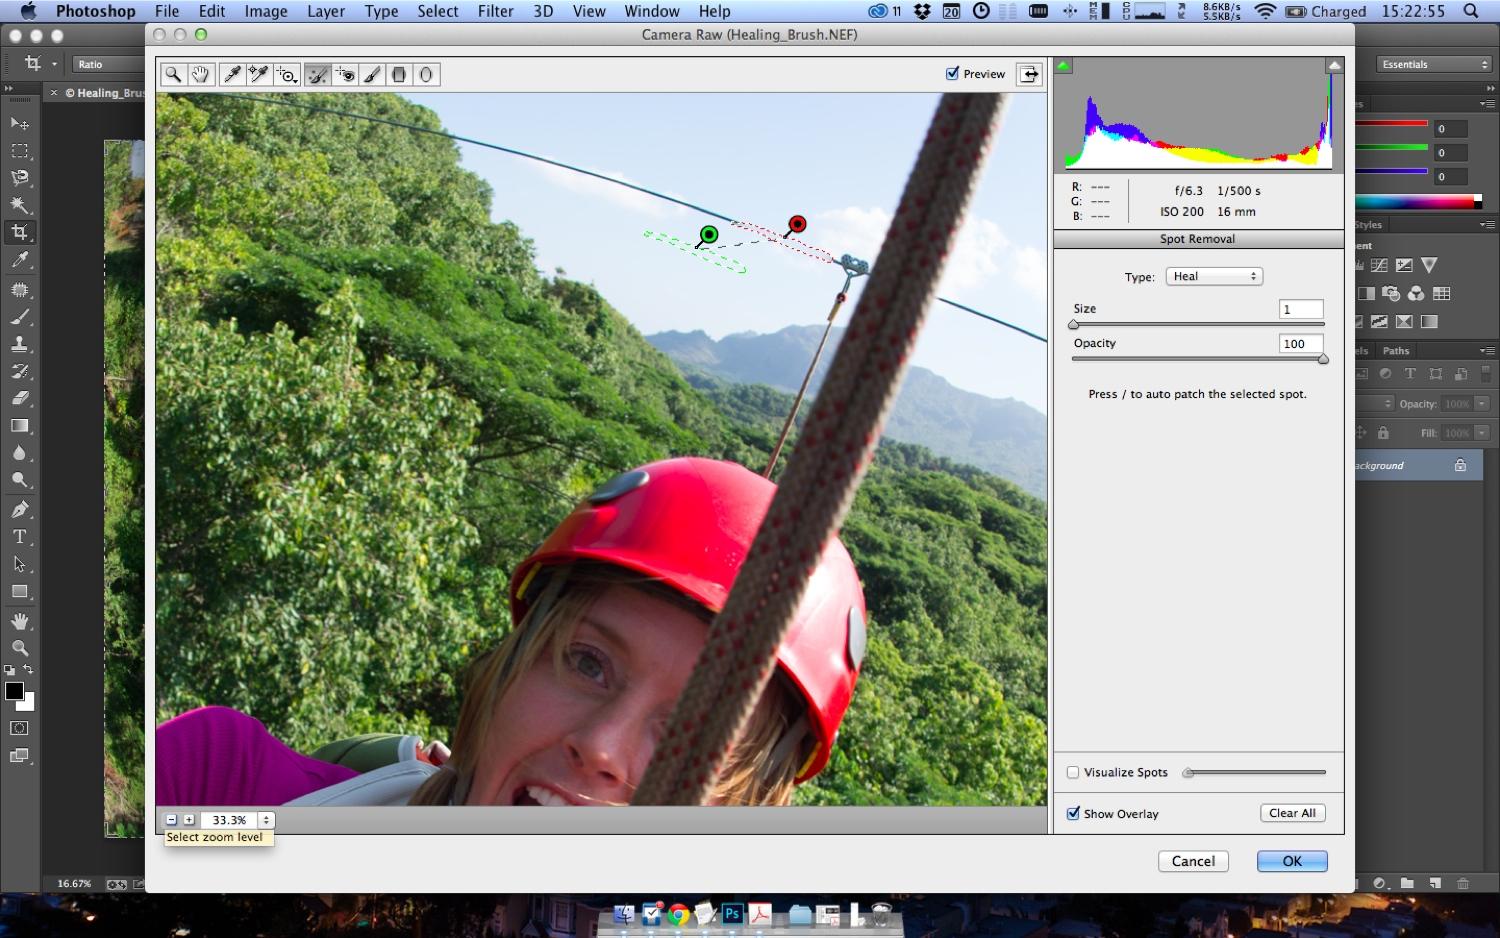
Adobe Camera Raw, which can now be accessed from the filter menu, introduces a radial filter, enhanced healing brush, and upright tool – all of which lie above the preview image – in Photoshop CC.
The Spot Removal tool has evolved from a circular touch-up tool. Now, you can paint over areas you want to retouch. After doing so, two pins show up: green to denote the source area and red for the retouching area. You then move the marquee with the red pin to other areas in the photo to match the retouched area.
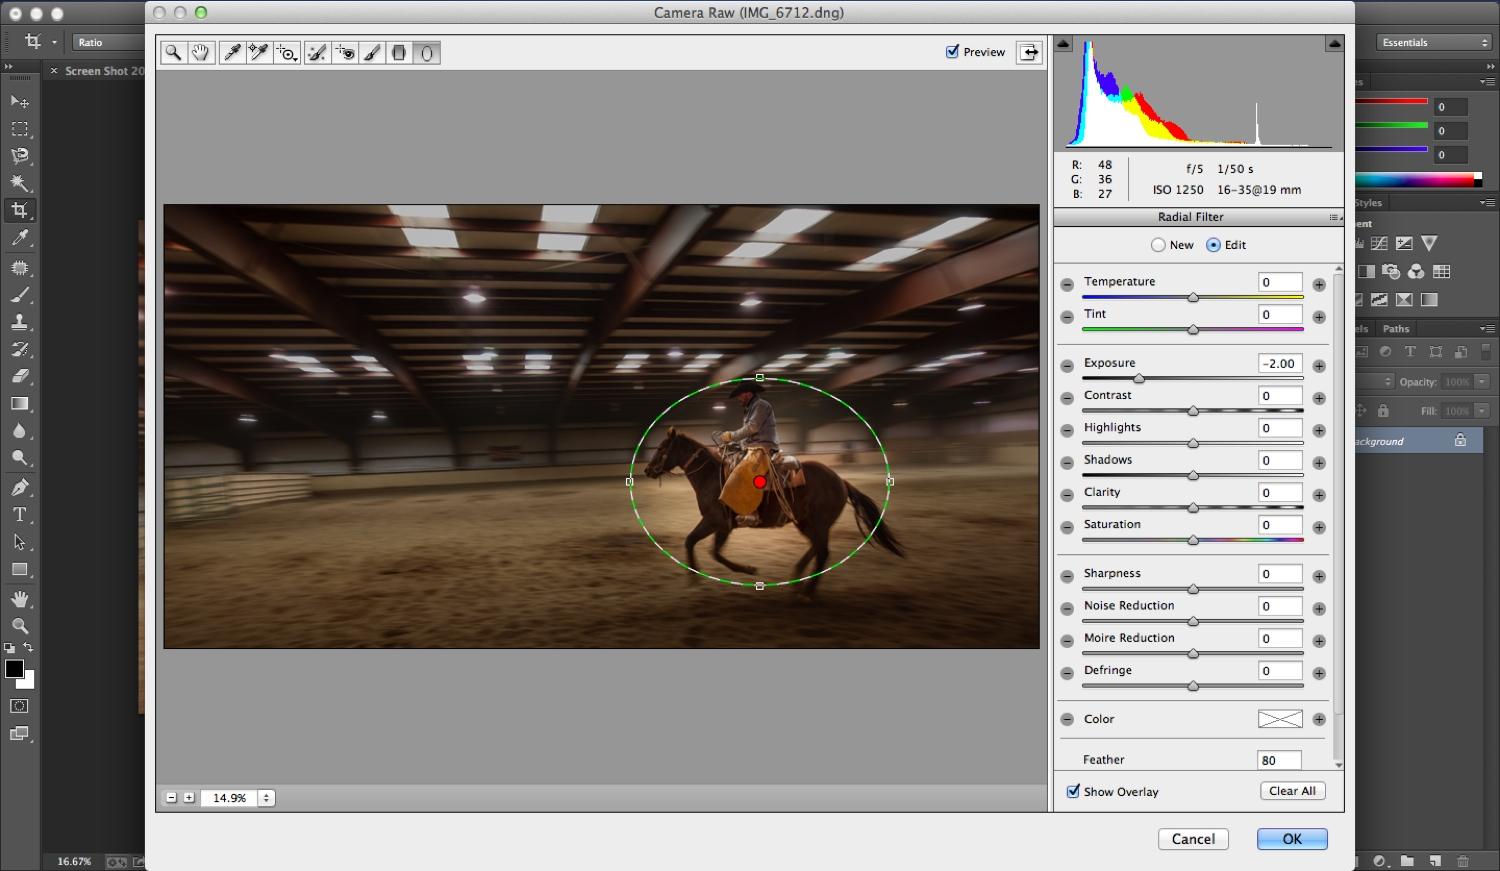
Radial Filter lets you apply image enhancements to specific areas outside of or within an oval mask. The strength of these edits – temperature, tint, exposure, sharpness, etc. – can be adjusted by changing the feather value.
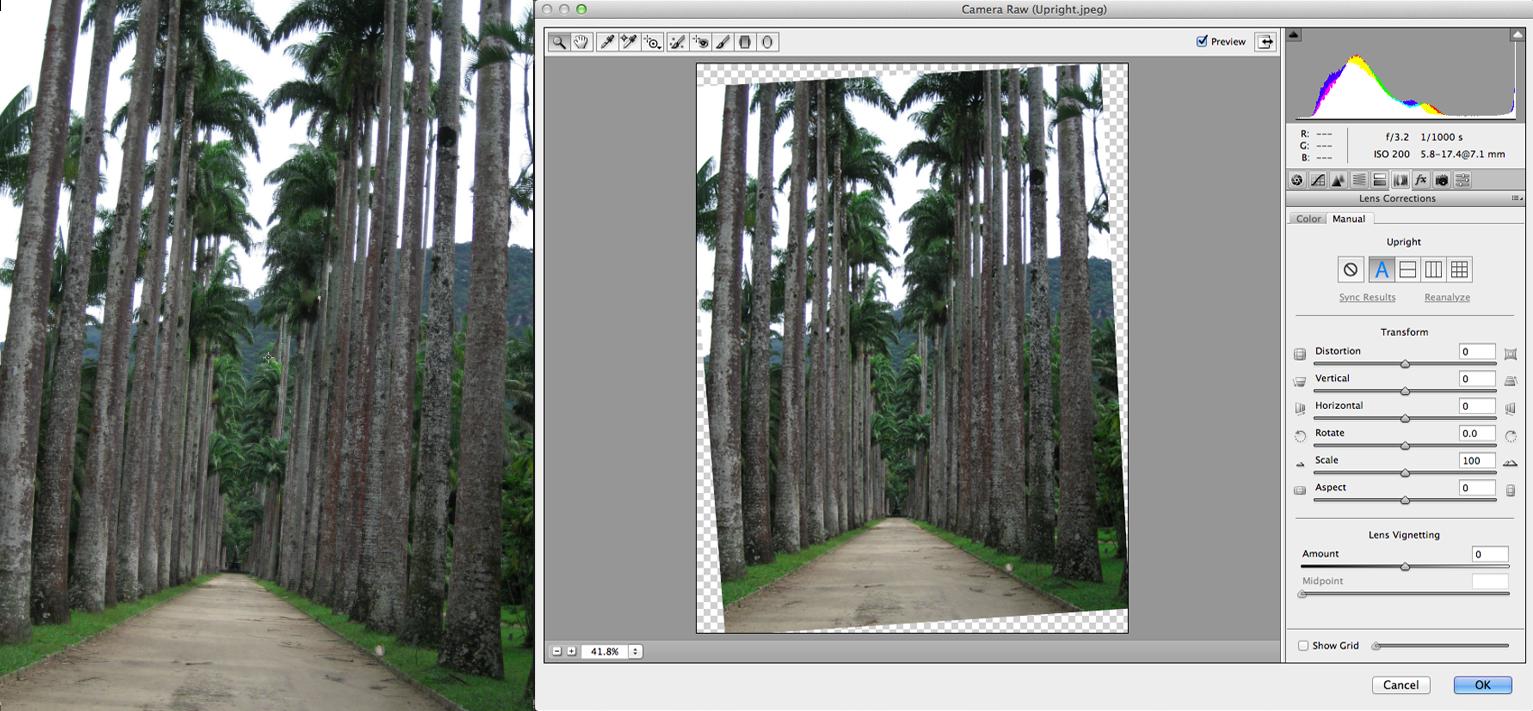
Upright is a tool to straighten images automatically. Under Lens Correction, select enable lens profile corrections. Under the manual tab, you’re presented with four tools for automatic adjustments as well as six manual transform sliders for fine-tuning.
One last note: Adobe Camera Raw can also be used as a smart filter, which applies adjustments non-destructively. To do so, convert the background layer to a smart object layer, located under the filter menu, before making adjustments.
Minimum/Maximum
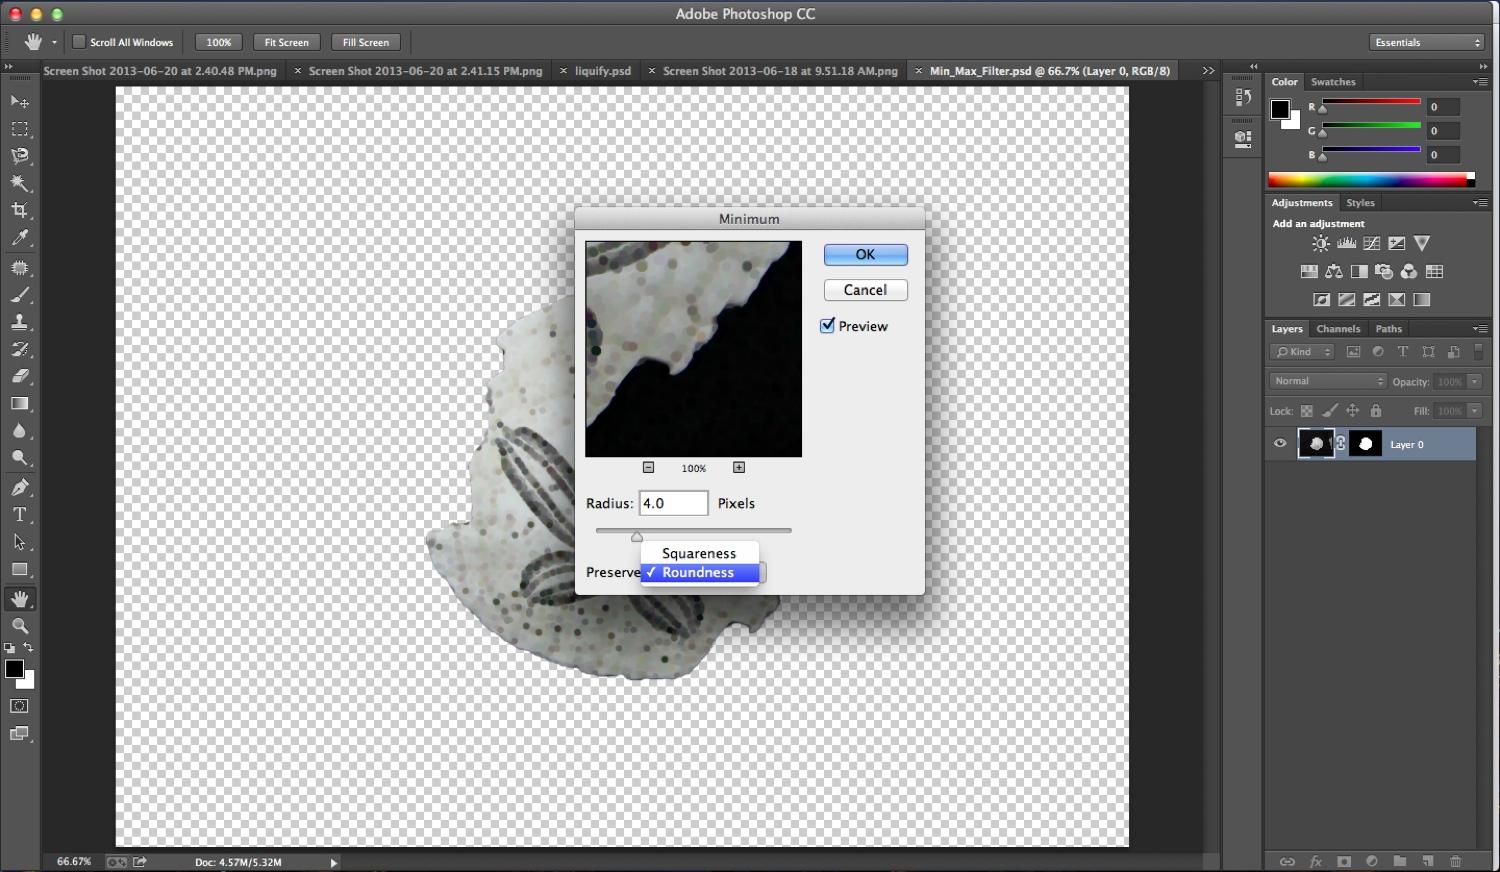
Under Minimum and Maximum, filters typically used to refine selection masks, there’s now a drop-down menu with options for preserving squareness or roundness. To extract objects from images, the filters analyze individual pixels within a radius, replacing the brightness value of selected pixels with the highest or lowest brightness value of surrounding pixels. Preserving roundness lets you fine-tune the quality of the edges of a layer’s mask while smoothing over the jaggedness that was common with the legacy option. Toggling between the two options highlights the differences in the preview window.
Creative Cloud

A glance at the Creative Cloud suite of apps.
As expected, there’s also integration of the Creative Cloud with Photoshop CC. The desktop app, which can be accessed from a Mac’s menu bar or a Windows machine’s system tray, includes five tabs: home, apps, files, font, and Behance.
Home is essentially the activity feed that shows app updates, sync status and interactions with others on Behance, a portfolio service Adobe acquired at the end of last year (see below).
The apps panel acts as a dashboard for Adobe applications, telling you which ones are installed, if updates are available as well as options to browse, download, and try other Adobe applications.
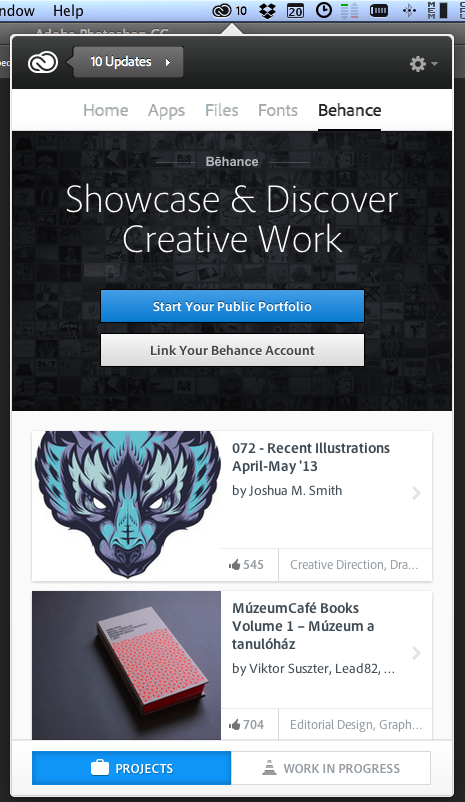
Adobe’s Behance service is integrated into Creative Cloud.
Files is the hub for Creative Cloud file storage. This can be accessed through the local Creative Cloud Files folder or through Creative Cloud itself. With the former, you have Dropbox-like options upon right-click. A Creative Cloud menu lets you view the file online, send a link, or add collaborators.
Fonts is where you manage Typekit fonts, which total more than 700. These fonts can be used both on the Web or on the desktop, which can be embedded in PDFs and other documents. The panel helps you find fonts and sync them to your desktop.
Behance is a service of more than 1.4 million users who showcase and discover creative work. Works can be published to Creative Cloud directly from Photoshop CC and Illustrator CC, or posted through the Creative Cloud desktop app.