
Masks and Channels in Adobe Photoshop CS6
Article Information
Contents
- 6. Masks and Channels
- Getting started
- Creating a mask
- Refining a mask
- Creating a quick mask
- Manipulating an image with Puppet Warp
- Working with channels
Article Description
Learn how to create a mask to remove a subject from a background, refine a mask to include complex edges, create a quick mask to make changes to a selected area, edit a mask using the Properties panel, manipulate an image using Puppet Warp, save a selection as an alpha channel, view a mask using the Channels panel, load a channel as a selection, isolate a channel to make specific image changes.From the book
Adobe Photoshop CS6 Classroom in a Book
$43.99 (Save 20%)
Note: This excerpt does not include the lesson files. The lesson files are available with purchase of the book.
Lesson overview
In this lesson, you’ll learn how to do the following:
- Create a mask to remove a subject from a background.
- Refine a mask to include complex edges.
- Create a quick mask to make changes to a selected area.
- Edit a mask using the Properties panel.
- Manipulate an image using Puppet Warp.
- Save a selection as an alpha channel.
- View a mask using the Channels panel.
- Load a channel as a selection.
- Isolate a channel to make specific image changes.

This lesson will take about an hour to complete. Copy the Lesson06 folder onto your hard drive if you haven’t already done so. As you work on this lesson, you’ll preserve the start files. If you need to restore the start files, copy them from the Adobe Photoshop CS6 Classroom in a BookDVD.
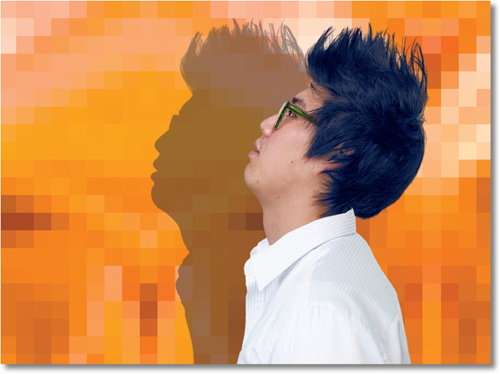
Photography © Image
Use masks to isolate and manipulate specific parts of an image. The cutout portion of a mask can be altered, but the area surrounding the cutout is protected from change. You can create a temporary mask to use once, or you can save masks for repeated use.
Working with masks and channels
Photoshop masks isolate and protect parts of an image, just as masking tape protects window panes or trim from paint when a house is painted. When you create a mask based on a selection, the area you haven’t selected is masked, or protected from editing. With masks, you can create and save time-consuming selections and then use them again. In addition, you can use masks for other complex editing tasks—for example, to apply color changes or filter effects to an image.In Photoshop, you can make temporary masks, called quick masks, or you can create permanent masks and store them as special grayscale channels called alpha channels. Photoshop also uses channels to store an image’s color information. Unlike layers, channels do not print. You use the Channels panel to view and work with alpha channels.
A key concept in masking is that black hides and white reveals. As in life, rarely is anything black and white. Shades of gray partially hide, depending on the gray levels (255 is the value for black, hiding artwork completely; 0 is the value for white, revealing artwork completely).